Oh yes. Gluten-free pierogi. This recipe was so well-loved by my family that I made it twice in 3 days. I rolled some thicker, some thinner, and it all went together flawlessly. The taste was even better. Everyone enjoyed them and my brother’s voice fell in the way only a fourteen-year-old boy’s can when I told him that no, there were no more.
I’ve made them just about every way. Make and boil right away, save leftover boiled ones in the fridge, panfry leftovers, microwave leftovers, or even freeze just-made ones and boil from frozen. It all worked. It all worked beautifully. I don’t think there was a way that I preferred. Everything was comforting and pleasing.
The August 2010 Daring Cooks’ Challenge was hosted by LizG of Bits n’ Bites and Anula of Anula’s Kitchen. They chose to challenge Daring Cooks to make pierogi from scratch and an optional challenge to provide one filling that best represents their locale.
I made a basic dough and filled almost all of them with a ricotta mixture. It was the perfect filling for my family and I. Mom loved every bite and Dad even declared “Pierogi Madness”. Yup. These ones did it. They’re here to stay. Thank you so much to Liz and Anula for introducing them!
Gluten-Free Pierogi Recipe
Adapted from the August 2010 Daring Cooks Challenge. Adaptation by Lauren of Celiac Teen.
Ingredients (makes about 36 to 40)
1 cup tapioca starch/flour (4.65 ounces)
1 cup sweet rice flour (5.25 ounces)
1/2 cup millet flour (2.85 ounces)
1/2 cup brown rice flour (3.00 ounces)
1 tbsp xanthan gum
1 tsp salt
1/2 cup milk
1/2 cup whipping cream
3 egg whites
Steps
Whisk together dry ingredients in a large bowl. Stir in wet ingredients until it comes together. This will be a slow process.
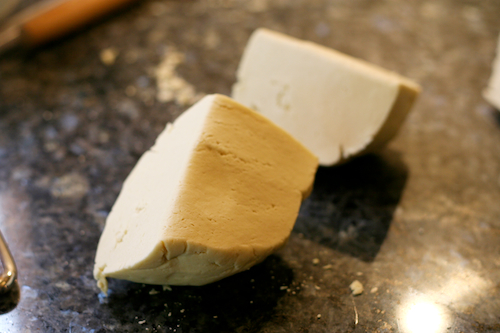
Once you have a piece that is big enough to knead, do so, slowly adding in some of the crumbly bits. Take a bit at a time, until it is all incorporated. Once the dough is pliable and feels good under your hands, with no streaks of dry flour in it, form into a ball. Cut off 1/4 of the ball and place the rest in your bowl, with a damp paper towel over-top to keep it moist.
Knead your quarter a little bit more, then roll out the dough, turning and moving as you go. I didn’t flour the surface because mine didn’t need it, but if yours is sticking quite well to the counter, roll out on a floured surface. Once the dough is quite thin (a few millimeters tall), cut into circles (a glass works great for this). If the cut circles need a touch of individual rolling, do so.
Place a small amount of filling (~ 1 tsp, depending on the size of your circles) in the centre and pinch the top together, then go up the side from bottom to the top and repeat on the other side, sealing up to the top. Finally, seal with a fork by going around the edge. Flip over and repeat.
Use the rest of the dough, one quarter at a time, until all of your pierogi are finished. Knead together scraps and re-roll. They did not suffer from being re-rolled.
To cook, bring water to a boil. Salt as desired. Cook pierogi in the boiling water for five minutes.
If freezing first, freeze on a flat surface in a single layer until frozen. Once frozen, place in a freezer plastic bag until needed. Mine were eaten within two days, but I suspect they would last at least one week, if not two in the freezer. When cooking them from frozen, do not thaw. Simply cook in boiling water for 5 minutes, the same as fresh.
Enjoy!
For my filling, I mixed together one 500 g package of ricotta (drained), 3 large egg yolks and some salt and pepper. For one and a half batches of dough, I used that. The other half, I used a purchased white bean pesto.
This post is linked to Slightly Indulgent Tuesdays.
I adored this dough. I could work with it all day (or at least until it was time to eat 🙂 ).
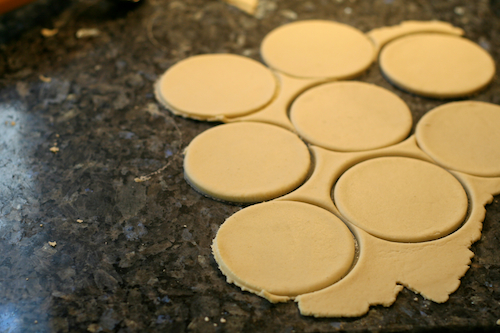
So simple. Lots of rolling and lots of cutting of circles, but that simply made it more and more fun.
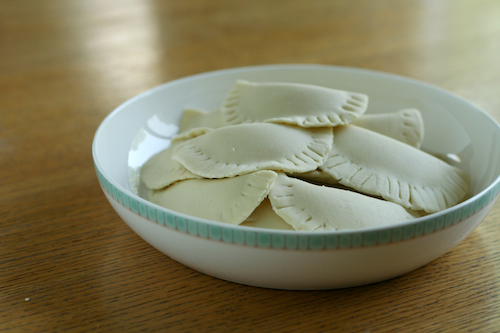
When they were formed, they looked like this. I wish I had a bowl of these in front of me right now, because that would mean that a meal of them would be only 5 (okay, maybe 8, including cooling time) minutes away.
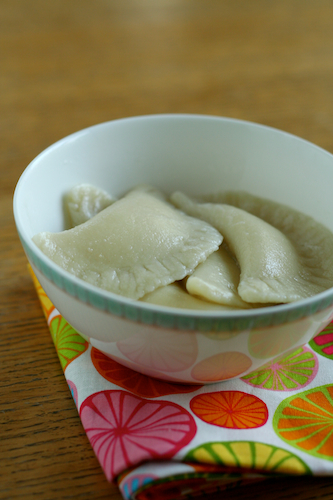
The boiled beauties. I need to make these often, or possibly teach my brother. With an end result like this, I know he could be game (at least more likely than many other things!).
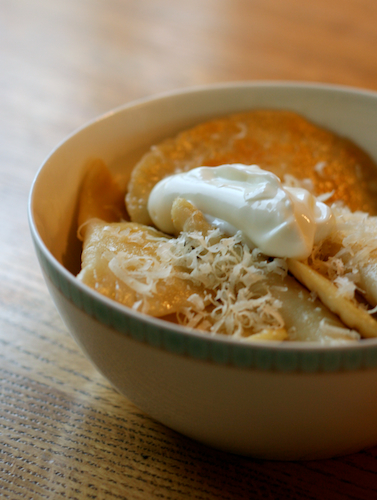
With the few that were leftover, I panfried some for a second meal. Top with some sour cream and good cheese and you’re golden. These were fantastic.
Now, before I say goodbye today, I would like to invite you to something (short notice, yes – I’m sorry for that). On Monday, I will be sharing my worst kitchen disasters. Those that we like to forget about. Those that help us learn the most. Those that were so incredibly bad that we ended up laughing because of how bad they were. Do you have those too? I thought so :). What I’m asking is simple: post about it on monday. Maybe it’s a few paragraphs, maybe it’s a few photos, maybe you dismissed it before any photos could be taken. Whatever the case, I can’t wait to see you back here then. I’ll link to all of the submissions, so we can all laugh and learn together!
xoxo
Lauren



{ 10 comments… read them below or add one }
← Previous Comments
Thank you so much for saving my Christmas! I’m still getting use to being gluten free and thought I would not be able to have pierogi’s at my Polish family Christmas dinner. They turned out great!
I just made these, and they are fantastic!! I actually grabbed an idea from another blog to make samosas using your recipe for the dough. I baked them with a curried chicken filling, and I am going to have to pack them away soon because I can’t stop eating them! The next test will be on my boys as soon as they get home! Thanks so much!
I’m making dinner fir my family and 4 of my siblings are gluten free. I was wondering could you do the dough and stuff them a day early and just keep them in the fridge?
Lydia, although I’ve never made them to keep in the fridge (I always opted for the freezer to keep them for longer periods), I’m sure that would be fine!
These look fantastic! I love perogis 🙂
I saw several people talk about the rolling out of the dough for pierogi. I make them fairly often using a pasta roller (the roller not the cutters). Here is how:
Once you make the dough, flatten it slightly with your hand so that it can fit into the pasta machine. On the widest setting (usually 0 or 1) pass the dough through. Then fold it in thirds. Rotate dough 90 degrees and run through it the machine again still at widest setting. Again fold it in thirds, rotate 90 degrees and repeat. Continue until the dough has a good consistency.
Then set the roller to the next smaller setting (so 2) and run the dough through. Run the dough through just once at each smaller setting. Usually a good thickness is achieved around a mid-range on a pasta roller (such as a 4 setting on a roller with 8 settings).
Then cut out our pierogi and continue the process. The pasta maker just takes the back breaking rolling out of the process.
I made these for the first time last Easter. They came out great and the experience of making them was not as difficult as I had imagined. This is because I made them many years ago as a teenager before I knew I had Celiac disease and the dough came out very chewy and tough. Horrible experience as I recall and I never made them again until I tried your recipe. Great work and thank you for sharing this. My daughter and sister, who both have Celiac disease, loved them!!!! I will be making them next week for Easter again…..can’t wait!
Hi
I want to make the perogi but have a couple of questions. Can you suggest a substitute for the whipping cream and egg whites I am allergic to both dairy and egg whites. I can use yolks. Also, the millet flour I have is dark and yet the picture of your perogies makes them look white.
Thanks bev
Hi I want to make the perogies but am allergic to dairy and egg whites. Can you suggest substitutes. Also the millet flour I have is dark a d the pic on your site makes them look white is there a white version if this flour?
Thanks
I just made these today, didn’t have sweet rice, but I did use jasmine rice and ground it up and then mixed it with white rice flour. I also have dairy issues, so I made cashew cream and used it in place of the whipping cream and milk. They tu r ned out very Yummy! For my filling, I used potato, goats milk cheese, green onion, garlic and bacon bits, and that was Delicious! Thanks!